Mumble 1.2 Setup Guide
I’ve noticed first time users struggle to get Mumble up and running, especially if they are coming from Discord, so I decided to write a post-installation setup guide.
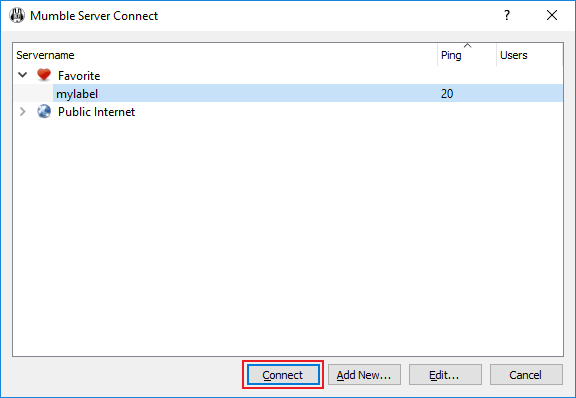
Add Server And Connect
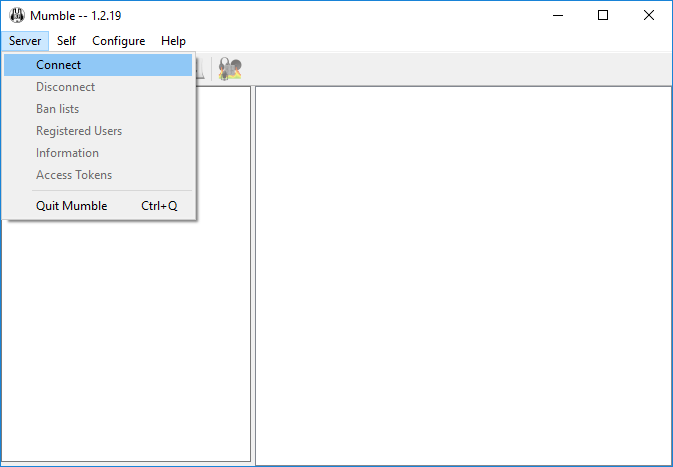
In order to connect to a Mumble server you will need to provide some simple
details. You can find the Add Server dialog menu by first clicking on the
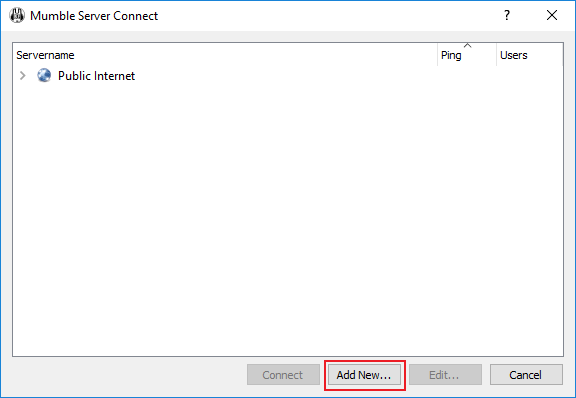
Connect button in the Server drop down memu, and then clicking on the Add
New... button in the Mumble Server Connect dialog.
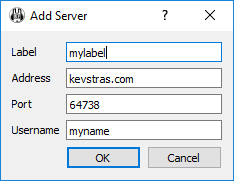
The Label field can be set to anything you want, it is just there to help you
remember this server later. You will want to get Address and Port from the
person who is inviting you to connect to the server. The Address field will
commonly be an IP address, unless the server you are connecting to has a URL
(like in my example). The Port field will most likely be left as the default
64738, but make sure to check. The Username field is where you set your
screen name that other users will see.
After you have added a server it is a simple matter of selecting that server and
clicking the Connect button. You should see your newly added server listed at
the top of the Mumble Server Connect dialog menu.
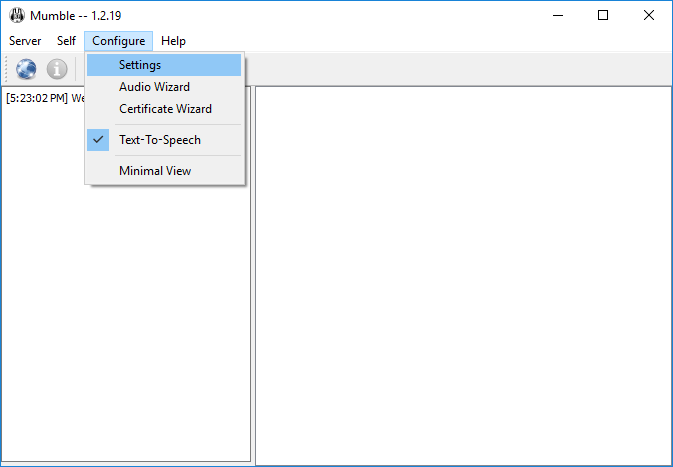
Configuration
Getting to the configuration menu is easy. Simply click Settings under the
Configure drop down menu.
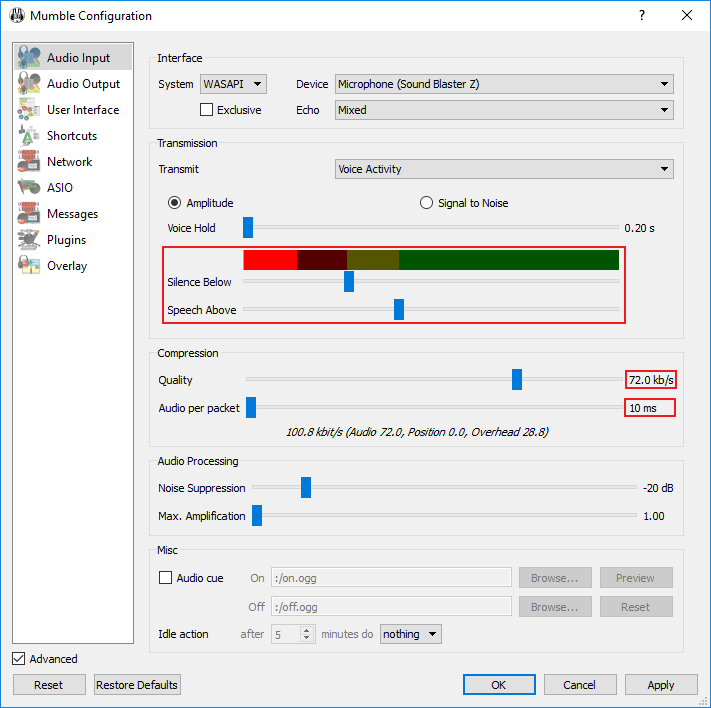
Audio Input
There are a few things in here I would recommend you change, take a look at the
red squares in the screen shot. Start by making sure you have the Advanced box
checked in the lower left corner of the screen.
The Silence Below and Speech Above sliders are the two most impactful
settings on this screen. You can find them in the Transmission section in the
middle of the screen. No one can give you the best settings for these sliders,
you will need to experiment and find what works for you. It is good practice to
come back to these sliders every so often to retune them.
Here is an outline of the procedure I use when tuning these sliders:
- Set your room and equipment up the way it is most often when you will be gaming. Put on your headset and adjust the position of your microphone. If you tend to have a fan running while you play games, go turn that on.
- Turn the
Noise Suppressionslider all the way down. If your audio card has some noise suppression or other audio processing settings, go turn all of that off (I’d suggest you leave it that way). - Now watch the
red/yellow/greenbar, it should be moving as your microphone picks up sound. Start moving theSilence BelowandSpeech Abovesliders up so that the level in the bar never goes above the red. While you are doing this make sure not to talk but don’t hold your breath. - Next try speaking at a natural volume. You should see the bar spiking into the
green. It is fine if it is not always in the green while you are speaking. If
you are not seeing it spike into the green, adjust the
Speech Aboveslider down. - Next you will want to make some continuous noise, like saying “uhhhhhh” for a
few seconds at a natural volume. You should see the
red/yellow/greenbar dancing between yellow and green levels. If it is dipping down into the red, try adjusting theSilence Belowslider down.
If some continuous background noise, like fans running, is causing the slider to
spike up to the green, then I would recommend adjusting the Noise Suppression
slider up slightly and run through the above procedure again.
Finally, it’s time to adjust the Quality and Audio per packet sliders. I
recommend you use 72.0 kb/s and 10 ms, respectively. This gives you great
quality as well as low latency for outbound audio.
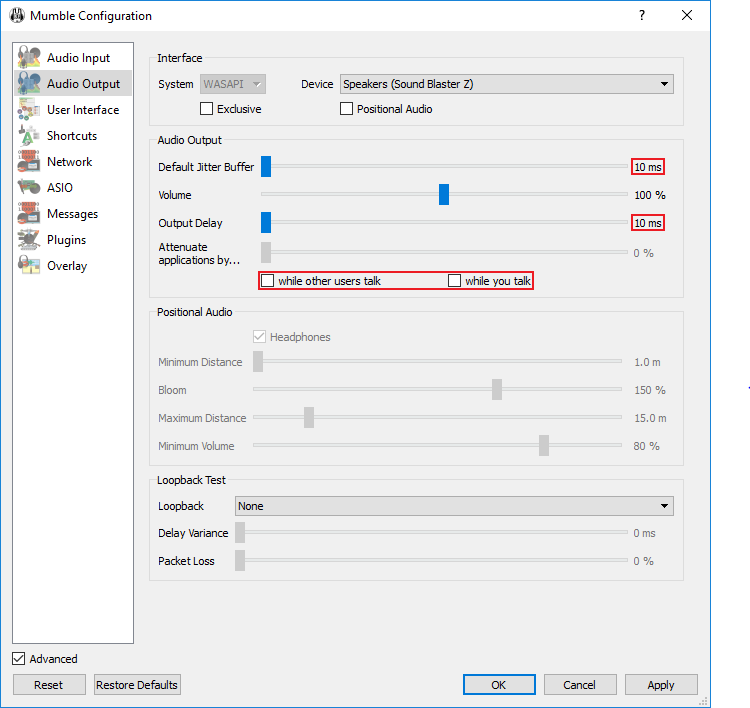
Audio Output
There are a few things in here I would recommend you change, take a look at the
red squares in the screen shot. Start by making sure you have the Advanced box
checked in the lower left corner of the screen.
First, slide the Default Jitter Buffer and Output Delay settings all the way
down to 10 ms. This is purely to reduce inbound latency as much as possible. If
you are hearing garbled voice or other audible issues you might want to
experiment with increasing these settings.
Second, uncheck while other users talk and while you talk boxes. If left
checked, volume is turned down all non-Mumble audio sources while others talk or
you talk, respectively. I find even slight changes to the game audio level to be
very annoying, hence why I uncheck these boxes.